How to install stainless steel pipe caps on copper pipes?
Sep 08, 2025
Leave a message
Installing stainless steel pipe caps on copper pipes is a practical task that combines the corrosion - resistance of stainless steel with the excellent conductivity and malleability of copper. As a reliable Stainless Steel Pipe Caps supplier, I'm here to share a detailed guide on how to carry out this installation process effectively.
Understanding the Materials
Before starting the installation, it's crucial to understand the properties of both copper pipes and stainless steel pipe caps. Copper pipes are widely used in plumbing and various industrial applications due to their high thermal and electrical conductivity, resistance to corrosion, and ease of installation. On the other hand, stainless steel pipe caps, such as those complying with ASTM A815 Stainless Steel Pipe Fittings and ASTM A182 Stainless Steel Pipe Fittings, offer superior strength and corrosion resistance, especially in harsh environments.
Tools and Materials Required
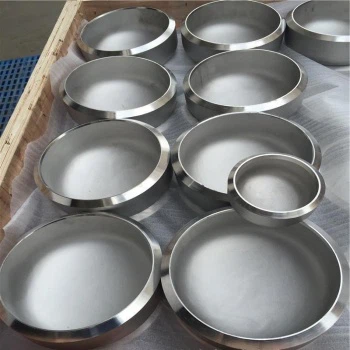
- Stainless Steel Pipe Caps: Make sure to select the appropriate size and type of Stainless Steel Pipe Caps that match the outer diameter of your copper pipes.
- Measuring Tools: A tape measure or caliper is essential for accurately measuring the pipe diameter to ensure a proper fit.
- Cleaning Tools: Wire brushes, sandpaper, and cleaning solvents are needed to clean the pipe ends and the interior of the pipe caps.
- Sealing Materials: Depending on the application, you may need Teflon tape, pipe dope, or O - rings to create a leak - proof seal.
- Installation Tools: Wrenches or pliers are used to tighten the pipe caps onto the copper pipes.
Step - by - Step Installation Process
Step 1: Measure and Select the Right Pipe Caps
First, measure the outer diameter of the copper pipe accurately. This measurement will determine the size of the stainless steel pipe cap you need. It's important to choose a cap that has an inner diameter slightly larger than the outer diameter of the copper pipe to ensure a proper fit. Our Stainless Steel Pipe Caps come in a wide range of sizes to meet different requirements.
Step 2: Clean the Pipe Ends and Pipe Caps
Cleanliness is key to a successful installation. Use a wire brush to remove any dirt, rust, or debris from the end of the copper pipe. Then, use sandpaper to smooth the surface and create a better bonding area. For the stainless steel pipe caps, clean the interior with a cleaning solvent to remove any manufacturing residues or contaminants.
Step 3: Apply Sealing Material
If you're using Teflon tape, wrap it around the male threads of the copper pipe in a clockwise direction. Make sure to overlap the tape slightly with each turn. For pipe dope, apply a thin layer evenly on the threads. If using O - rings, place them in the appropriate groove inside the pipe cap.
Step 4: Install the Pipe Caps
Carefully place the stainless steel pipe cap over the end of the copper pipe. Align it properly to ensure a straight fit. Then, use a wrench or pliers to tighten the cap onto the pipe. Be careful not to overtighten, as this can damage the threads or cause the pipe to deform. A gentle but firm tightening is usually sufficient to create a secure and leak - proof connection.
Step 5: Check for Leaks
Once the pipe cap is installed, turn on the water supply or apply pressure to the system (depending on the application). Check for any signs of leakage around the connection. If you notice any leaks, you may need to loosen the cap slightly, re - apply the sealing material, and then retighten it.
Troubleshooting
- Leakage: If there is a leak, first check if the sealing material was applied correctly. You may need to add more Teflon tape or pipe dope. If the problem persists, the threads on the pipe or the cap may be damaged, and you may need to replace the affected parts.
- Difficulty in Tightening: If you're having trouble tightening the pipe cap, make sure the cap and the pipe are properly aligned. If the threads are seized, you can try using a penetrating oil to loosen them.
Advantages of Using Stainless Steel Pipe Caps on Copper Pipes
- Corrosion Resistance: Stainless steel is highly resistant to corrosion, which can extend the lifespan of the copper pipes, especially in areas with high humidity or exposure to chemicals.
- Strength and Durability: Stainless steel pipe caps provide additional strength to the pipe ends, protecting them from damage during handling and operation.
- Aesthetic Appeal: Stainless steel has a sleek and modern appearance that can enhance the overall look of the piping system.
Maintenance Tips
- Regular Inspection: Periodically inspect the pipe caps for signs of corrosion, damage, or leakage.
- Cleaning: Clean the pipe caps with a mild detergent and water to remove any dirt or debris.
- Re - sealing: Over time, the sealing material may wear out. Re - apply the appropriate sealing material as needed to maintain a leak - proof connection.
Conclusion
Installing stainless steel pipe caps on copper pipes is a relatively straightforward process that can bring numerous benefits to your piping system. By following the steps outlined in this guide and using high - quality Stainless Steel Pipe Caps, you can ensure a reliable and long - lasting connection.
If you're interested in purchasing stainless steel pipe caps for your projects, we invite you to contact us for more information and to discuss your specific requirements. Our team of experts is ready to assist you in finding the best solutions for your needs.

References
- ASME B36.19M - 2012, Welded and Seamless Austenitic Stainless Steel Pipe.
- ASTM A815/A815M - 20 Standard Specification for Wrought Stainless Steel Piping Fittings.
- ASTM A182/A182M - 20 Standard Specification for Forged or Rolled Alloy and Stainless Steel Pipe Flanges, Forged Fittings, and Valves and Parts for High - Temperature Service.
Send Inquiry